| Product |
| 1 pcs.:
HK$285.00 |
2 pcs.(bulk pack):
HK$478.00 |
10 pcs.(bulk pack):
HK$1958.00 |
|
|
|
|
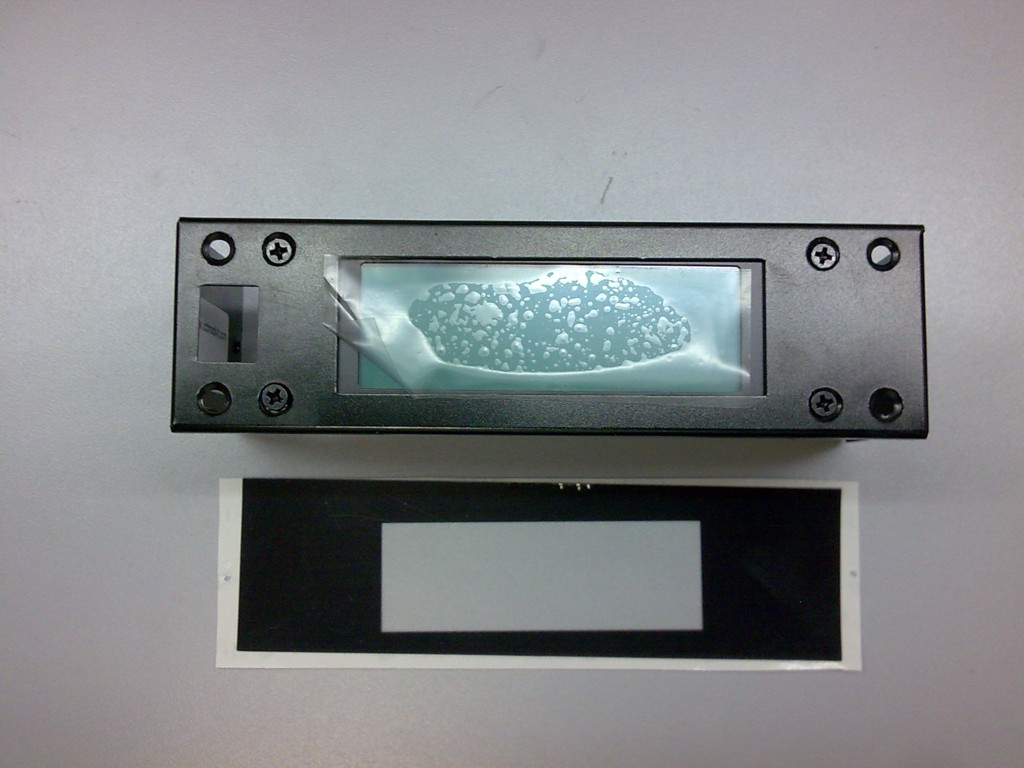
(1) Brand
(2) Pixel Color
(3) Background Color
(4) Polarizer Type
(5) Backlight
(6) Cover sheet
(7) Data Transfer
(8) Resolution
(9) Frame Dimensions
(10) Screen Size
(11) Work with
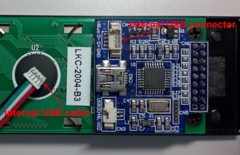
(12) USB connection
(13) DLL for LCD Smartie
(14) DLL for programming
(15) Software
(16) Internal USB cable |
: Lcdmod Kit
: Bluee
: White
: +ve Transflective
: White Backlight
: Black color & Silver provided
: USB 1.1 compliant
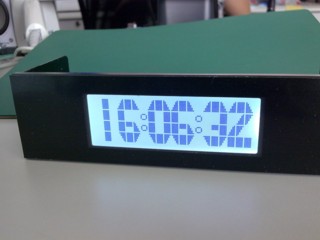
: 20 Characters x 4 Lines
: 150.0 x 43.50 x 60.0 mm (W x H x L) *Remark*
: 76x26 mm
: Lcd Smartie, lcd4linux and LCDProc
: mini-B / internal USB connector
: Free (Work with Win 98 / XP, Vista, Windows 7 32&64 bit)
: Free (Work with Win 98 / XP, Vista, Windows 7 32&64 bit)
: Free LCD Smartie (Work with Win 98 / XP, Vista, Windows 7 32&64 bit)
: Included (600mm long) |
|
Ship by registered air mail (with tracking number)
Installation Guide : Windows 7 64bit Installation Guide U204FB-A1.pdf
Windows Vista/7/8 Driver : driver
Windows XP Driver : driver
Smartie dll : LCD Smartie dll
Download "LCD Smarite" here |
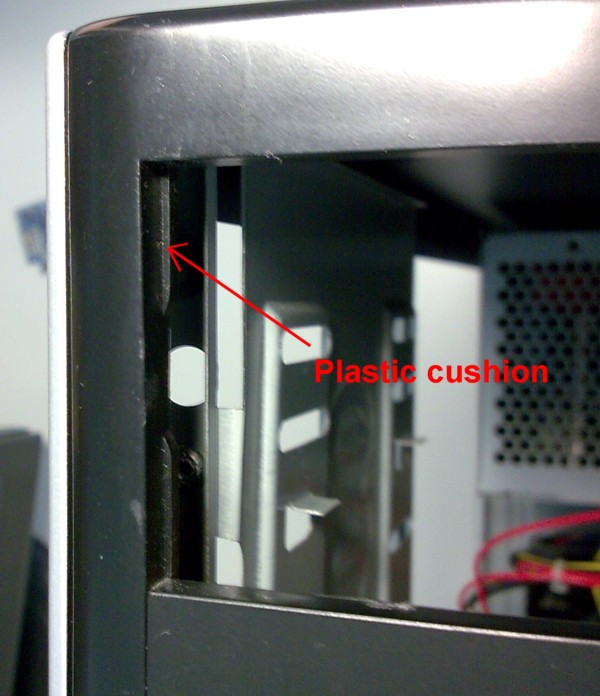
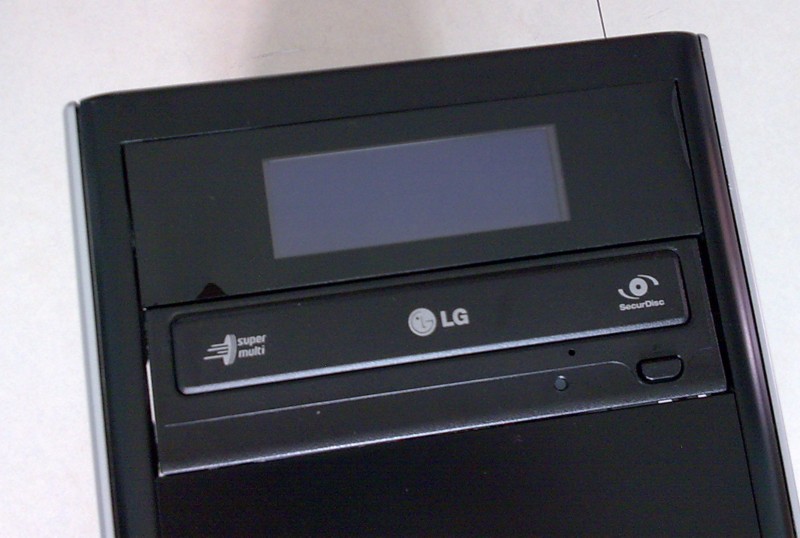
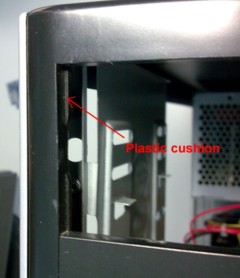
| *Remark* The frame is very tight to the bay drive, you have to file some plastic cushion of PC case by sand paper or file. Please read the hardware installation guide in details. Thanks. |
  |
  |
  |
  |
| |
|
| Hardware Installation Guide |
 |
 |
 |
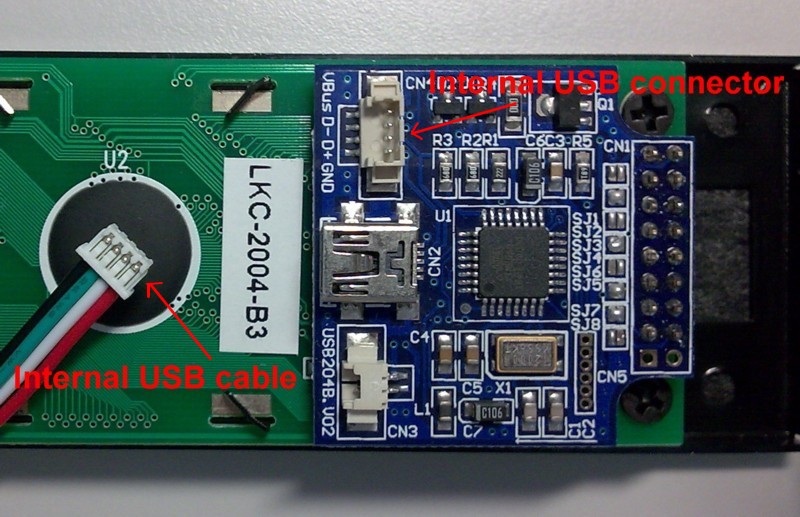
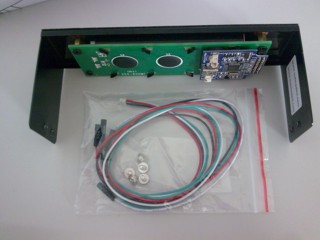
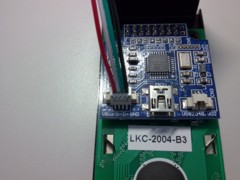
| 1. Prepare the internal USB cable. |
2. Plug the internal USB cable to the internal USB connector as picture. VBus is red and GND is black in color. |
3. Filing the plastic cushion of your PC case by sand paper or file. That's can make the frame can fit into bay drive. |
 |
 |
 |
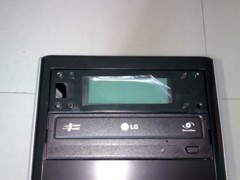
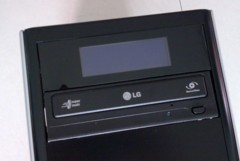
| 4. Insert the frame into the bay drive. |
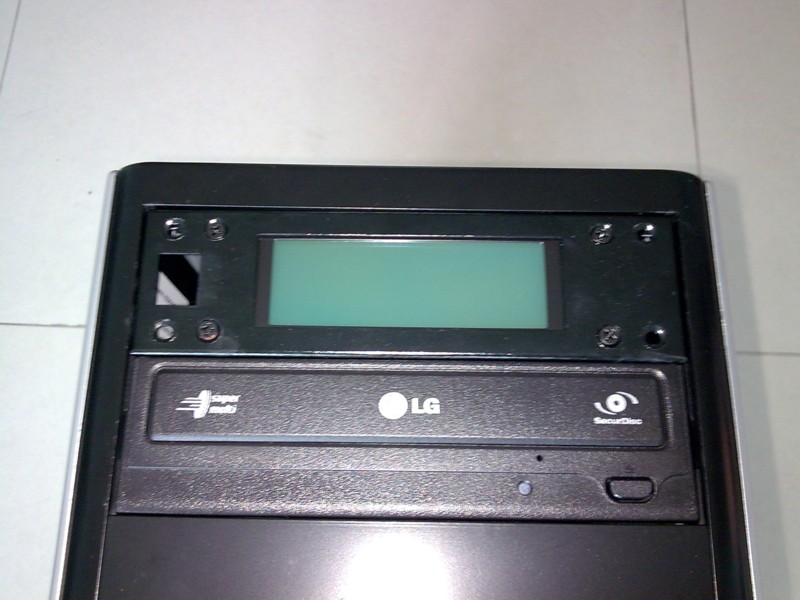
5. Peel off the protective layer of LCD. |
6. Stick the cover sheet on the front end of frame carefully. |
 |
 |
 |
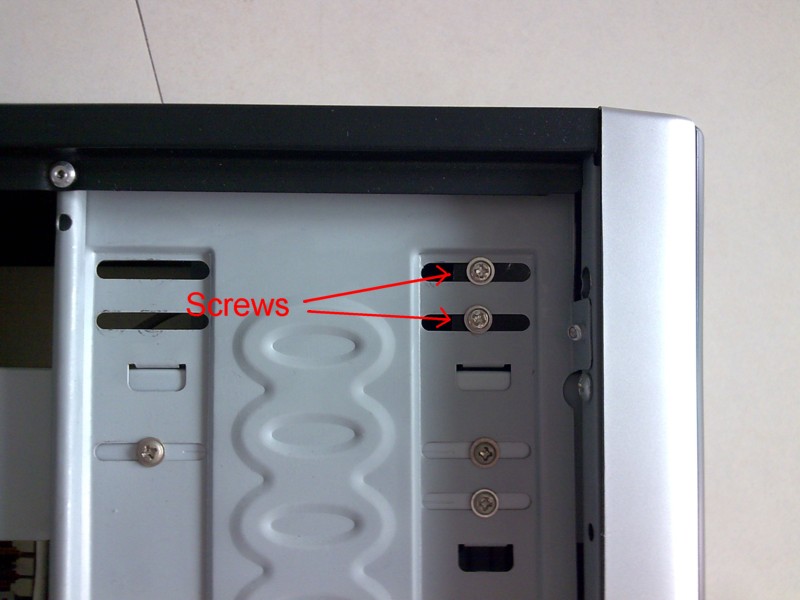
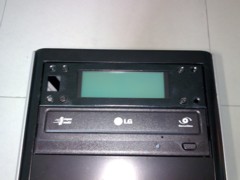
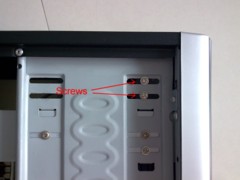
| 7.Mount those bay drive screws. |
8.Peel off the protective layer of cover sheet. Outlook like this. |
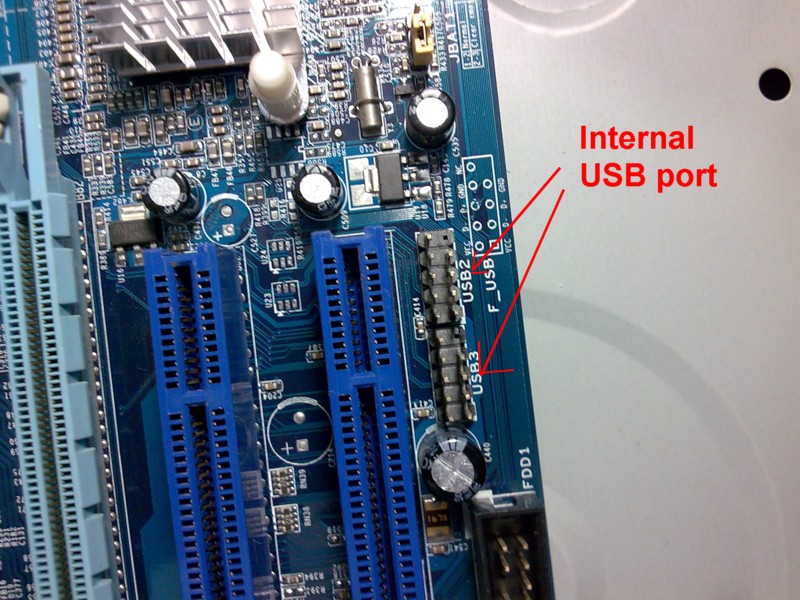
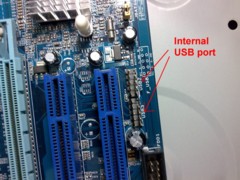
9. Find mainboard USB port accoding to your mainboard manual. |
 |
 |
|
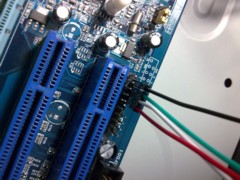
| 10.Plug the internal USB cable on the main board.
Vcc is red, GND is black, D+ is green and D- is white in color. |
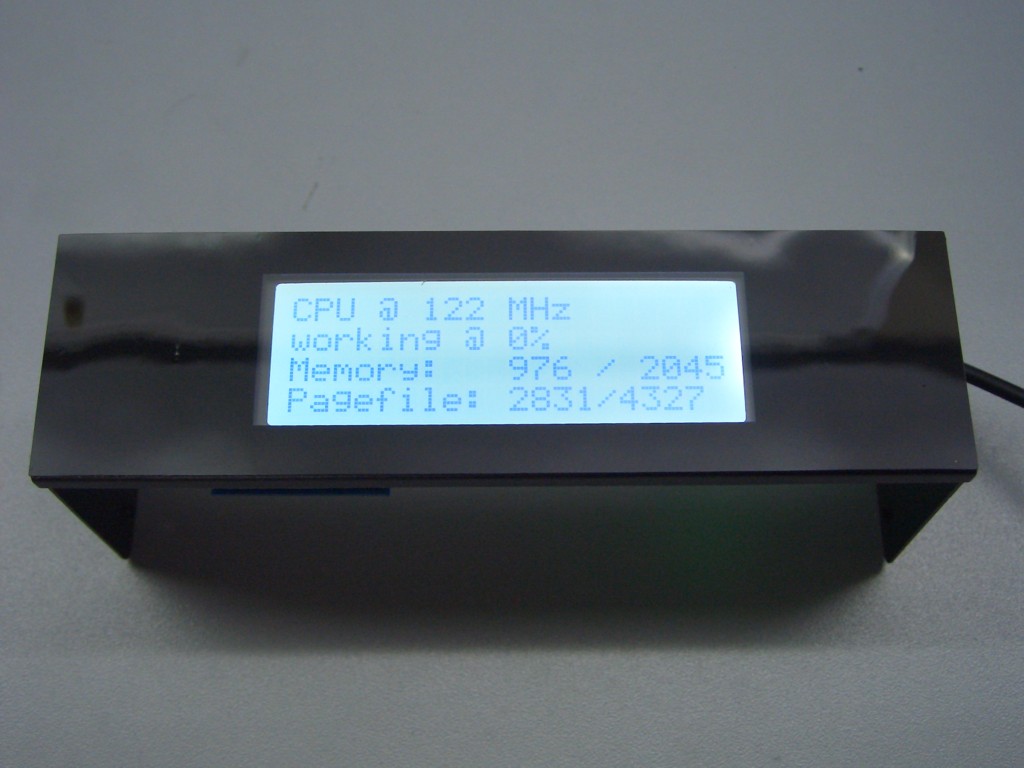
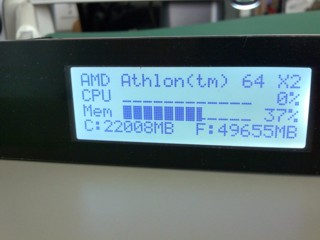
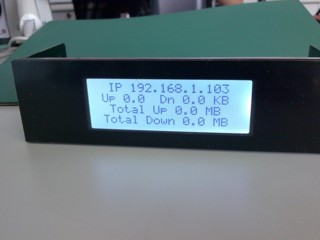
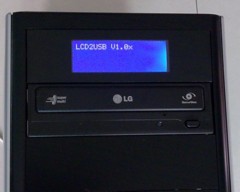
11. After PC turn ON, welcome message will be shown on screen. |
|
|
|
Driver Installation Guide - Vista 32 bits
(Vista 64 bits users, please read our instruction for marking your own signed driver certificate) |
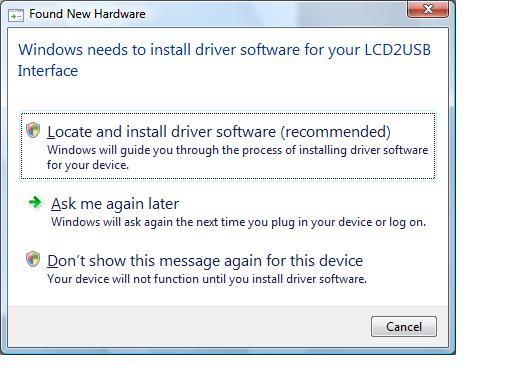 |
| 1. After plug in this device to USB port, new hardware found message will shown on screen. Choose "Locate and install driver software (recommended)" |
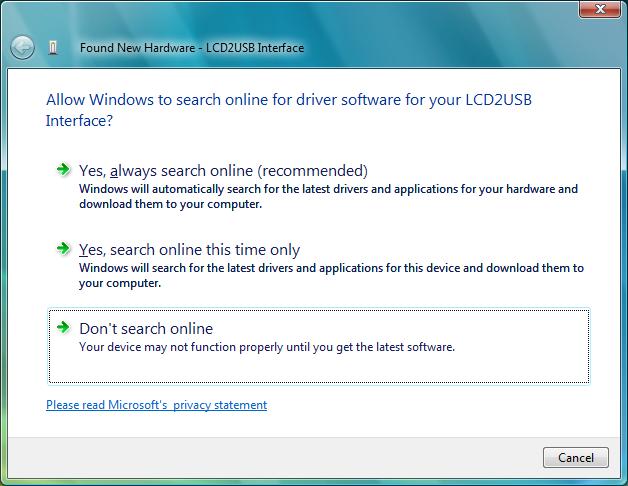 |
| 2.Choose "Don't search online". |
| |
| 3.Click "Next" if you are using the driver CD-ROM. Choose "I don't have the disc. Show me other options" if you download the driver from our web. Then, find the driver from the folder you locatd. |
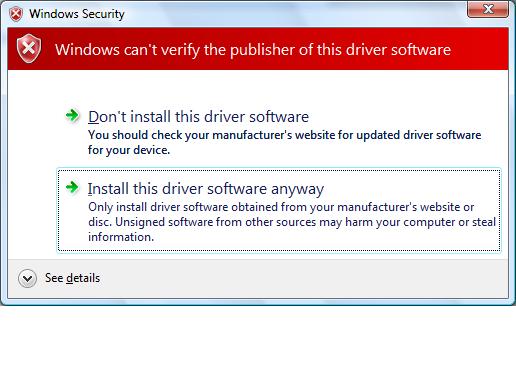 |
| 4.Click "Install this driver software anyway. |
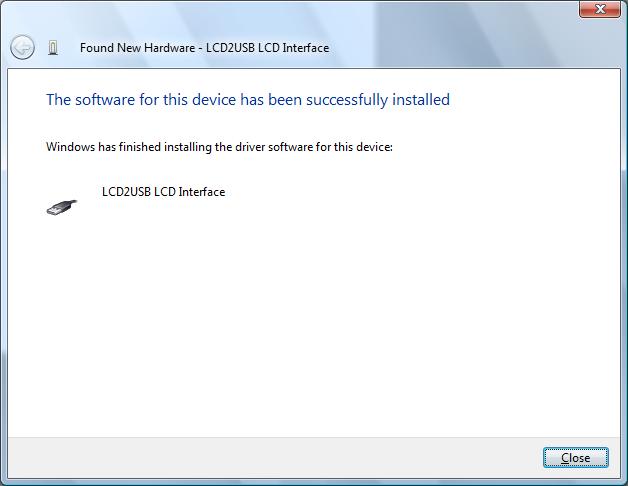 |
| 5. The driver of this device has been successfully installed and device is ready to use. |
|
|
| Application Installation Guide & LCD contrast / Backlight brightness tuning - LCD Smartie |
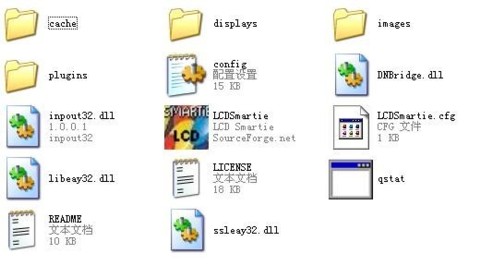 |
| 1. Copy the whole folder "lcd.smartie-v5.4 " to any folder/driver of your PC and click into the folder and run "LCDSmrtie". |
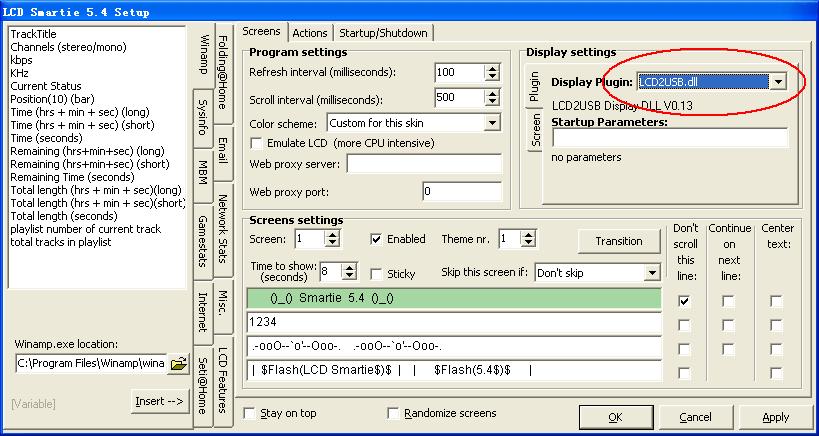 |
| 2.Click in the setup and make sure Display Plugin is "LCD2USB.dll". |
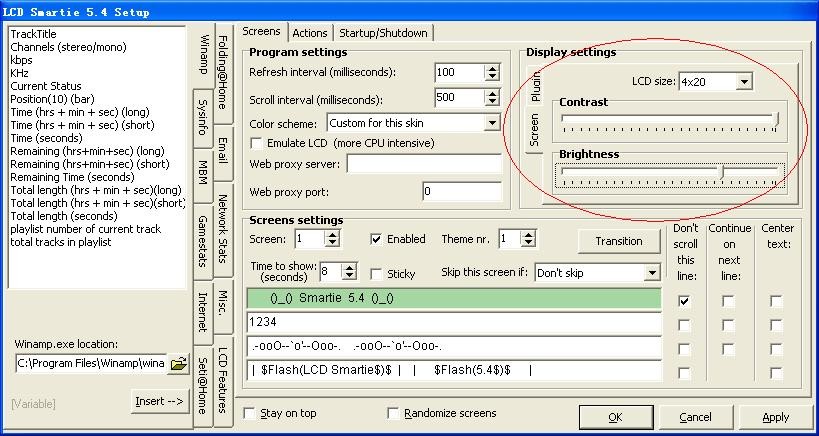 |
| 3. Set the screen according to your LCD. LCD contrast and backlight brightness can be tune here. |
 |
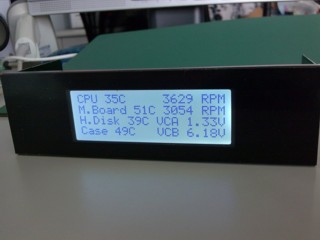
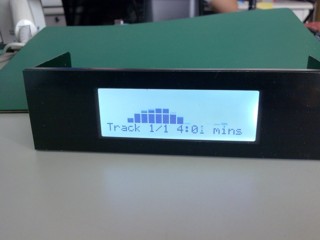
| 4.Finished. LCD Smartie information is shown on the LCD now. |
|
|
|
 © 2001-2099 Lcdmod Kit. All Rights Reserved.
http://www.lcdmodkit.com
|
|